Sunday, July 11, 2010

In-line Growth


The photo on the left shows in-line drip irrigation tubing placed over the landscape as recommend in my book Drip Irrigation, for Every Landscape & All Climates. The right photo is a bit over one month of growth. Good growth. less water.

“BUY FROM THE SOURCE TO HELP KEEP WRITERS WRITING”


Let me know what you think. Visit my web site to learn about my new book on drip irrigation and other gardening books. Thanks, Robert

Wednesday, July 7, 2010

My Garden


A view of my little garden. I let the foxglove "walk around". A different pleasure each year. This section was drip irrigated for three years, then 20 years without irrigation. Not a benefit to a publisher of my book Drip Irrigation for Every Landscape All Climates.

Tuesday, July 6, 2010

Chaos as Beauty


I came out one morning to see dozens of spider orbs gracing the former summers lavender stalks. An angelic beauty I had only seen this once because I now prune back all my lavenders. This photo never got into my book The Lavender Garden (Still for sale on web site for only $10.) It came about as I had let one section of my tight plantings, deeply-mulched garden go without any work for several years before I started to tend for it in a “natural” way. You’d never see this gorgeous photo in Martha Stewart Living!

“BUY FROM THE SOURCE TO HELP KEEP WRITERS WRITING”


Let me know what you think. Visit my web site to learn about my new book on drip irrigation and other gardening books. Thanks, Robert

Thursday, June 24, 2010

Grape Roots


These grape roots reveal a lot about root growth in naturally shallow soils. The roots here are all in the top two feet of the soil.

Roots find conditions the most cushy and convenient near the surface of the soil and will do almost anything to live there. Since they can’t find their way through hardpan or less fertile soil, it can be quite deep and there’s no real reason to try to break it up. If the drainage is poor and water is likely to flood the roots, and if there is some decent soil beneath the hardpan, then breaking through will probably be required. With this grape vineyard the soil is shallow and clay is like a hardpan just a few feet below the surface. Notice how large the diameter of the surface roots are. The roots haven’t been able to piece the clay to get to the lens (pocket) of gravel and sand much deeper in the soil.

Based on my book, Roots Demystified, Change Your Gardening Habits to Help Roots Thrive.


“BUY FROM THE SOURCE TO HELP KEEP WRITERS WRITING”


Let me know what you think. Visit my web site to learn about my new book on drip irrigation and other gardening books. Thanks, Robert

Friday, June 18, 2010

Trees Bent Out of Shape, Actually the Right Way


Summer and many gardeners are planting trees. But what to do with wobbly trees after they are cut from the stake in the pot or B&B?

If it’s necessary to stake a new skinny-trunked transplant to keep it from flopping, the lower you tie the tree to the stake(s), the more the trunk will be able to flex and strengthen in the wind. To determine the best height for tying (a height which will allow flexing but not flopping), grab the trunk with your right hand near the top and gently bend the top over with your left hand. You’ll notice that the tree is able to return to an upright position. Move your right hand down the trunk and continue bending and releasing the top with your left hand. At a certain point, the top will stay flopped over and not regain its upright position. Tie the tree to the stakes at a point six inches higher than the last position of your right hand. From my book, Roots Demystified, Change Your Gardening Habits to Help Roots Thrive.


“BUY FROM THE SOURCE TO HELP KEEP WRITERS WRITING”


Let me know what you think. Visit my web site to learn about my new book on drip irrigation and other gardening books. Thanks, Robert

Wednesday, June 16, 2010

On the right road to drip irrigation


I've been seeing more and more use of in line emitter tubing in commercial settings. Here's a sample from Kaiser's (my HMO) parking lot. I applaud the circles of in-line tubing as it follows some of the recommendations as outlined in my book - Drip Irrigation for All Landscapes & All Climates. However the inner circle is not needed as the crown of this tree would get plenty of water with the single outer circle. This is outlined in my book - Roots Demystified,Change You Gardening Habits to Help Plants Thrive.

“BUY FROM THE SOURCE TO HELP KEEP WRITERS WRITING”


Let me know what you think. Visit my web site to learn about my new book on drip irrigation and other gardening books. Thanks, Robert

A crime, don't do this at home.


I first stumbled on the disgusting hack job someone did on the tree on the left. Little did I know at would serve such a glorious purpose as shown on the right. :)

Monday, June 14, 2010

Get Your Wet Spots Figured Out


The drawing in the middle is from my book Drip Irrigation – For Every Landscapes & All Climates, it shows an ideal view of how the wet spots on the surface merge together 2-6 inches below the soil’s surface. The photo on the left shows the spots of irrigation on the surface of potting soil filling a horse trough. Notice how much of the soil appears to be dry. The other photograph shows the soil after I created a hole 4 inches deep – moisture is in the entire block of soil. These emitters are the 1/4-inch inline tubing with emitters every 12 inches. I’ll show, in later blogs, the resulting growth.


“BUY FROM THE SOURCE TO HELP KEEP WRITERS WRITING”


Let me know what you think. Visit my web site to learn about my new book on drip irrigation and other gardening books. Thanks, Robert

Thursday, May 27, 2010

Peasant Gardens versus Convenience


One of the big trends in gardening these days is planting a multilayered garden with edible plants as ground cover, shrubs, & fruit trees, with a few herbs and/or ornamentals thrown into the mix. I was intrigued by this concept in the mid-70s. I learned my lesson well—the hard way.

Mixing layered plants with & under fruit trees is a royal pain in the @#s. You’re forever looking for a place to step without squishing the other, lower plants. It must increase the picking & pruning time by a factor of three to ten times. Another problem is finding any fallen fruit so as to not leave any pests or diseases around to infect the tree the next year.

The mixture of layers of bearing crops is really based on peasant culture, especially in the tropics. If you read the books carefully, you’ll find a lot of the “models” are actually based on non-temperate plantings. The tropics has a completely different soil ecosystem. The tropics stores most of its nutrients above ground for rapid availability of nutrients. In temperate zones, it’s the other way around. Soil not in the tropics, such as most of America, stores much of the nutrients in the soil. To take a tropical model & transfer it to a temperate climate is fraught with the possibility of failure.

Furthermore, the tropical models usually stem from a highly knowledgeable peasant demographic. The people are trained via many generations of cultivators where tried-and-trusted cultivation techniques are common. The tropical ecosystem combined with skilled knowledge of the ecosystem often makes for lush, multi-layered plantings. In America, most families have two working people. What to do in the “spare time” is critical. A layered planting takes so much extra time that I don’t recommend it. Rather than the two photos of peach trees with roses, irises, and dozens of other plants beneath & beyond the dripline of the tree, I prefer clustering fruit trees in a zone with continuous mulch as seen in David Ulmer’s front yard. The time saved for other recreational activities is greatly increased. The planting of beneficial insect attracting plant well beyond the current & future diameter of the fruit tree works fine as must beneficial insects can easily fly into fruit tree zone to pray upon pests.

It’s a matter of choosing between an aesthetic bias, a preference an intellectual concept, or the convenience of zoning the trees together. This doesn’t mean linear rows like a commercial orchard. Instead I plant fruit trees on an irregular spacing to look more like a grove of trees. Another excellent approach is to plant two, three, four or more trees in the same planting spot—as David does. The photo without plants & a continuous mulch beneath is a planting for David’s wise use of fruit trees. This gives the opportunity to increase the variety of fruit while looking less like a typical orchard.

“BUY FROM THE SOURCE TO HELP KEEP WRITERS WRITING”


Let me know what you think. Visit my web site, www. rkourik.com, to learn about my new book on drip irrigation and other gardening books. Thanks, Robert

Wednesday, May 26, 2010

Peasant Gardens vrs. Convenience


One of the big trends in gardening these days is planting a multilayered garden with edible plants as ground cover, shrubs, & fruit trees, with a few herbs and/ornamental thrown into the mix. I was intrigued by this concept in the mid-70s. I learned my lesson well—the hard way.

Mixing layered plants with & under fruit trees is a royal pain in the @#s. You’re forever looking for a place to step without squishing the other, lower plants. It must increase the picking & pruning time by a factor of three to ten times. Another problem is finding any fallen fruit so as to not leave any pests or diseases around to infect the tree the next year.

The mixture of layers of bearing crops is really based on peasant culture, especially in the tropics. If you read the books carefully, you’ll find a lot of the “models” are actually based on non-temperate plantings. The tropics has a completely different soil ecosystem. The tropics stores most of its nutrients above ground for rapid availability of nutrients. In temperate zones, it’s the other way around. Soil not in the tropics, such as most of America, stores much of the nutrients in the soil. To take a tropical model & transfer it to a temperate climate is fraught with the possibility of failure.

Furthermore, the tropical models usually stem from a highly knowledgeable peasant demographic. The people are trained via many generations of cultivators where tried-and-trusted cultivation techniques are common. The tropical ecosystem combined with skilled knowledge of the ecosystem often makes for lush, multi-layered plantings. In America, most families have two working people. What to do in the “spare time” is critical. A layered planting takes so much extra time that I don’t recommend it. Rather than the two photos of peach trees with roses, irises, and dozens of other plants beneath & beyond the dripline of the tree, I prefer clustering fruit trees in a zone with continuous mulch as seen in David Ulmer’s front yard. The time saved for other recreational activities is greatly increased. The planting of beneficial insect attracting plant well beyond the current & future diameter of the fruit tree works fine as must beneficial insects can easily fly into fruit tree zone to pray upon pests.

It’s a matter of choosing between an aesthetic bias, a preference an intellectual concept, or the convenience of zoning the trees together. This doesn’t mean linear rows like a commercial orchard. Instead I plant fruit trees on an irregular spacing to look more like a grove of trees. Another excellent approach is to plant two, three, four or more trees in the same planting spot—as David does. The photo without plants & a continuous mulch beneath is a planting for David’s wise use of fruit trees. This gives the opportunity to increase the variety of fruit while looking less like a typical orchard.

“BUY FROM THE SOURCE TO HELP KEEP WRITERS WRITING”


Let me know what you think. Visit my web site, www. rkourik.com, to learn about my new book on drip irrigation and other gardening books. Thanks, Robert

A Tasty Way to Landscape


Long before the Berlin wall came down, the arbitrary horticultural barriers between the vegetable garden and the flower border, between fruit trees and shade trees, and between herbs and ornamental flowers had already begun to crumble. This was due to a new trend known as edible landscaping, which sprang up in the mid-1970’s and combined food-growing and landscaping with a sense of design, an eye to color and the intention of producing bountiful harvests.

A beautiful edible landscape, garden or allotment is a feast for all the senses — imagine sculptural green broccoli set off by vivid orange and yellow calendula petals; the sweet fragrances of rosemary and lavender wafting throughout the garden; the taste of sweetly-tart 'Pink Pearl' apples with marbled pink and white flesh (Seen above in bloom and as cooked in a tart.) or a rainbow of color on salads topped with the spectacular edible blossoms of pansies, nasturtiums, roses, or anise hyssop.

Peasant farmers are perhaps the world’s greatest organic edible landscapers, since without the resources of wealthy industrialized civilizations, they naturally grow a great amount of their food right next to (or very close to) their homes, practically guaranteeing well-tended fresh produce. Edible landscaping is peasant gardening done within the limitations of our busy modern times. In other words, organic edible landscaping is nothing new, just a timely revival. In my book (Designing & Maintaining Your Edible Landscape - Naturally - still in print after 24 years, see my web site www.robertkourik.com), I draw upon both the intuitive peasant gardeners as well as the latest in horticultural science.

Golden Rules for Edible Landscaping
Regardless of where you live, there are a few important guidelines to consider for a well-designed and productive edible landscape. Over the past 25 years, while teaching about, installing and designing such landscapes, I’ve formulated what I call the “Golden Rules of Edible Landscaping,” to deal with common stumbling-blocks. Some examples:

• Start ever so small.
• Try to plant your vegetables no further from the kitchen sink than you can throw it
• Be lazy; let nature work for you.
• Time and money spent early means even more time and money saved later.
• Plan in advance; make your mistakes on paper, not in your landscape.
• Try to incorporate plants that serve more than one use.

Avoiding the Tyranny of Edibility
Some people assume that an edible landscape involves replacing all their ornamental plants with edibles. Heavens no! A landscape made entirely of edible plants would be an enormous burden to all but the most compulsive gardener, the wealthy, or the retired. The concept is to have a productive landscape which appears ornamental in its overall design. In my book I recommend those with yards less than 2400 square feet should have no more than 50% of the area planted with edibles (and this figure may be ambitious). The main point is to start very small and grow only what you can reasonably harvest without having to turn your edible landscape into another full-time job.

“BUY FROM THE SOURCE TO HELP KEEP WRITERS WRITING”


Let me know what you think. Visit my web site, www. rkourik.com, to learn about my new book on drip irrigation and other gardening books. Thanks, Robert

Monday, May 24, 2010

Foxy Flowers - Foxgloves


My garden is full of dozens of foxglove that have seed themselves, leading to a wide range of colors-from creamy white to pink, rosy pink, and almost deep red.

Our eyes see delightful beauty in our gardens. People see all the colors of the rainbow; red, orange, yellow, green, blue, indigo, and violet. Bees do not see red and can only distinguish between six colors:, blue-green, blue, violet, ultraviolet, and yellow. They can see a color called "bee's purple," a mixture of yellow and ultraviolet.

Some of the splendor in garden flower remains unseen. Each foxglove blossom has a different set of splotches all the way into its throat, like little runway guides leading to the sweet nectar. These are intriguing enough. But there’s more. A pollinating bumble bee see something beyond our vision. Bumble bees have a pair of six-sided, compound eyes and three simple eyes. Even with such complex eyes, their sight is accurate for only about three feet. A special light guides bumble bees on their lusty journeys for pure nectar. Bumble bees see ultraviolet light. A pattern of ultraviolet coloration lures a bumble bee into the foxglove flower’s throat. These patterns unseen by our eyes act like the signals of an airport’s landing strip. And the ultraviolet splotches of color don’t match the random splotches we see in the sunshine.

The earth’s protective atmosphere shields us from much of the sun’s ultraviolet light (radiation). Enough ultraviolet radiation filters through to aid bumble bees in their daily journeys. Even on a cloudy day, the bumble bees see the ultraviolet spectrum by cloud-penetrating ultraviolet light. What assists bumble bees on their quest for pollen and nectar can cause us to sunburn—part of the two-sided tapestry of life.

In each blossom the pollen is in the roof of the flower so the upper body of the bumble bee is brushed with the pollen as the bumble bee goes deeper into the blossom to seek out the sweet nectar (as seen here). After flying to another flower, the pollens are mixed and seed formation begins. The pollination process leads to plants with a mixture of colors. An isolated stand with creamy flowers will have cream colors until a seedling of a rose-colored blossom pops up nearby. Then things get interesting as different blends of color appear.


“BUY FROM THE SOURCE TO HELP KEEP WRITERS WRITING”


Let me know what you think. Visit my web site, www. rkourik.com, to learn about my new book on drip irrigation and other gardening books. Thanks, Robert

Sunday, May 23, 2010

Mustering more info. about mustards


More fooder for the discussion about mustard plants growing in vineyards.

In college, Knoll, who has a Ph. D. in Chemistry, researched the science of allelopathy—the study of the toxic or antagonistic chemicals (many of which are called secondary metabolites) which some plants produce. These compounds act, in Knoll's words, "as ecological chemicals to gain an advantage over other plants and act like an ‘immune system’ for the plant." These chemicals have a number of impacts, such as stunting the growth of other plants or suppressing their germination of seed. For example, Rick points out: "All Brassica roots exude a secondary metabolite (glucosinolates —related to mustard gas) which inhibits grass-seed germination; this slows down the grasses and lets the Brassica get a really strong start. It doesn't kill the grasses; it's just a mechanism for competition."


(From Bob's Newsletter, Vol. 1. No. 2. See www.robertkourik.com to buy the entire article about Rick Knoll, one of the best organic farmers in Northern California.)

“BUY FROM THE SOURCE TO HELP KEEP WRITERS WRITING”


Let me know what you think. Visit my web site to learn about my new book on drip irrigation and other gardening books. Thanks, Robert

Thursday, May 20, 2010

Drip Increases Yields, much of the time


Numero uno is one of the often poorly-understood concepts about drip irrigation.

There are many scientific studies which indicate that drip irrigation can improve growth and yields. For example, in 1981 T. A. Howell et al surveyed 50 research reports on crops grown with drip irrigation, and concluded: “Where trickle [drip] irrigation was compared with either no irrigation or other water-application methods, yields were equal or better in all cases; and the amounts of water applied were equal or less with only two exceptions.” (As summarized by D. A. Bucks and F. S. Nakayama and A. W. Warrick in “Principles, Practices, and Potentialities of Trickle (Drip) Irrigation,” Advances in Irrigation, Vol. 1).

Research in many different climates and states invariably supports the benefits and cost-effectiveness of drip irrigation. Art Gaus, an extension horticulture specialist with the University of Missouri at Columbia, MO, has had a drip system in his personal garden for nine years. One summer, his bush watermelons with plastic mulch and a drip system produced 32 pounds in a four-by-four-foot area, compared with 9–16 pounds in the same area with conventional irrigation. He reckoned a well-timed drip system “could mean a 100% increase in yields; during the droughts of 1980, ’83, and ’84, it meant the difference between having a crop or no crop at all.”

In a study of established pecan trees in Georgia, trees with drip irrigation added had a 51% increase in yields.

Michigan State University has documented a 30% yield increase in vegetable crops with drip irrigation, even in its humid, summer-rain climate.

A study in India in 2002, found that with chilies, water use was down 34–50%, while production was up 33–48%. The researchers attributed this to irrigation that kept the soil moist, not too dry.

A study in New Mexico found amazing differences in yields compared to [respectively] furrow and drip irrigation: 18 pounds versus 30 pounds with cucumbers, 69 to 156 pounds growing Swiss chard, and 64 versus 166 pounds with green beans—to quote a bit of the study. [It is interesting to note that broccoli, Brussels sprouts, and carrots didn’t have any greater yields in the drip irrigation plots. Yet, a study at Oregon State University found a 20% increase in carrots compared to plots with sprinklers.]

To be fair, the benefits of drip irrigation are not confirmed across the board in agricultural studies. There are a number of studies which show it to be less beneficial than sprinklers, especially with perennial and tree crops. One such example is found in a paper entitled “Growth and Yield of Rabbiteye Blueberry as Affected by Orchard Floor Management Practices and Irrigation Geometry,” by K. D. Patten et al. in The Society, September 1989, Journal of the American Society for Horticultural Science, Vol. 114 (5) pg. 724-728. This study found that 360-degree sprinklers created better plant establishment and growth than either one emitter or two emitters per shrub. This is one of many cases where agricultural limitations (such as having to keep the area between tree rows free of tubing and emitters so tractors can mow or disc) greatly restrict both the number of emitters which can be used and their placement. In my drip-irrigation book (Drip Irrigation for Every Landscape and All Climates, 2nd Edition, Metamorphic Press, 2009), I very specifically recommend that emitters be placed equidistant throughout the entire root zone—which would include the area equivalent to that between the rows. The results in the abovementioned study are only to be expected when a dramatically reduced proportion of the root zone is watered by a mere emitter or two.

“BUY FROM THE SOURCE TO HELP KEEP WRITERS WRITING”


Let me know what you think. Visit my web site (www.robertkourik.com) to learn about my new book on drip irrigation and other gardening books. Thanks, Robert

Lawn Irrigation That's Really "Out of Sight"


Lawns, yawns. They aren’t needed as much as they are found. However, there's no better place to have young kids run around and, play badminton or croquet, or necking while watching the stars. (This subsurface approach to irrigation means you can neck at the same time the lawn is being irrigated!)

The latest revolution in irrigation is happening quietly underground, four to eight inches beneath lush, but water-conserving lawns. Although landscape professionals have long utilized the water-conserving efficiency of drip irrigation for most other types of plantings; combining it with lawns has, until recently, been an unsolvable problem.

Now, however, it's possible to irrigate lawns with emitters buried safely beneath the soil's surface that save even more than the 20-50% watering efficiency of surface emitters.

The idea of subsurface lawn irrigation often raises many concerns. What, for instance, keeps the entombed emitter from becoming plugged by soil? The answer is in-line emitter tubing. The emitters, which are located inside this tubing, contain a lengthy internal pathway which is known as a complex, turbulent or tortuous path. (See the illustration here from Drip Irrigation for Every Landscape & All Climates.) When the system comes on, water pressure purges any soil that may have entered the emitter's orifice. The turbulent pathway is also very self-cleaning when sediment is suspended in the water.

Another common concern is the possibility of the emitters becoming clogged with grass roots. This can be prevented by timed irrigations, which should be both frequent (daily or even hourly) and very brief. Depending upon the soil and climate, for only a matter of minutes, or less—depending on the number of start times. Some brands of in-line tubing also come impregnated with a pre-emergent herbicide which kills root growth at emitter openings. (The roll photographed here has the noticeable greenish tube emitters.) While no organic gardener would use the Treflan™ found in the impregnated emitter, it’s toxicity is very low and the chemical does not migrate far from the emitter.

Designers and clients also may worry about unevenly-watered lawns with telltale green-brown-green striping. Mark Dargay, of EH Griffith Inc., (a distributor of TechLine™ in-line tubing) designed the subsurface irrigation for the Market Square project, 12,000 square feet of turf and trees in downtown Pittsburgh, PA. "I was very leery," Dargay remembers, "I envisioned striping of the lawns." After two summers of healthy non-striped growth, he’s "very pleased."

A word of caution: neophytes in drip irrigation should make their first mistakes above ground with visible or mulched in-line tubing before attempting a subterranean "deployment."

Dennis Hansen, a L.A. and Certified Irrigation Designer in Fairfield, CA, advises designers new to subsurface irrigation to "start with no more than 1000 square feet. Or, hire an irrigation designer with enough experience to have a defensible and insurable status."

The details of how to design an efficient system can be found in my book— Drip Irrigation for Every Landscape & All Climates.

P.S. DON’T attempt if you have gophers. Best in urban areas.


“BUY FROM THE SOURCE TO HELP KEEP WRITERS WRITING”


Let me know what you think. Visit my web site to learn about my new book on drip irrigation and other gardening books. Thanks, Robert

Drip Paraphernalia


It' time for tuning up & testing drip systems. If, gawd forbid, you have a a system with lots of punched-in emitters you'll need to carry around spare emitters, a punch, goof plugs & more. Use a box with lots of chambers like the sewing paraphernalia shown on the left. Or, boxes used for fishing hooks & gear or small tool boxes with transparent plastic covers. Although the sewing box is illustrated in my book, Drip Irrigation for Every Landscape & All Climates, you can skip most of these tiny, tedious parts by using in-line tubing where there are no emitters to break off, adjust, or repair. The in-line tubing in this patch of beans (on the right) is streamlined, easy to roll out, and you can never damage the internal emitter. With a two- to four-inch mulch layer over the tubing, you can walk or use a wheelbarrow on top of the tubing with no damage. Light folks can even step on the tubing without damage. Be sure to flush all lines before starting to use the system.

“BUY FROM THE SOURCE TO HELP KEEP WRITERS WRITING”


Let me know what you think. Visit my web site to learn about my new book on drip irrigation and other gardening books. Thanks, Robert

Sunday, May 16, 2010

Basket Bondage?


It’s spring in full-tilt boogie. Where there are gophers, the trend has been to plant in wire baskets. In the past ½-inch aviary wire was used. While fairly easy to work with, it doesn’t last a long hardware cloth with regards to rust. There are some pre-made commercial wire baskets. They aren’t very deep, but the wire is studier than aviary wire.

The fear is what happens to the roots that grow thru the wire. As illustrated in my blog of 5/10/10, many roots are eaten at the wire’s edges. This makes the plant more like a container plant with the roots feeding only within the wire basket. Those that do manage to escape the cruddy teeth of the western pocket gopher have to deal with growing in and thru the wire.

The question is as the roots that grow thru the basket, as shown on the left, get harmed and is growth reduced? Wire can be included within the tissues of growing plants without apparent harm. The other photograph shows how an oak tree is slowly swallowing a 4” X 4” sign post.

In my experience a plum tree planted in a very shallow wire basket was greatly stunted. It failed to produce the thicket of long spindly shoots each summer. With all the other trees planted within 4’ deep & 3’ wide baskets, seems the trees a perfectly happy. They are the Asian pear, plum, plumcot, apple, and persimmon trees.

So it seems wire is simple swallowed up by the basket and the transport of water & nutrients up-and-down the tree remains relatively unharmed.


“BUY FROM THE SOURCE TO HELP KEEP WRITERS WRITING”


Let me know what you think. Visit my web site to learn about my new book on drip irrigation and other gardening books. Thanks, Robert

Wednesday, May 12, 2010

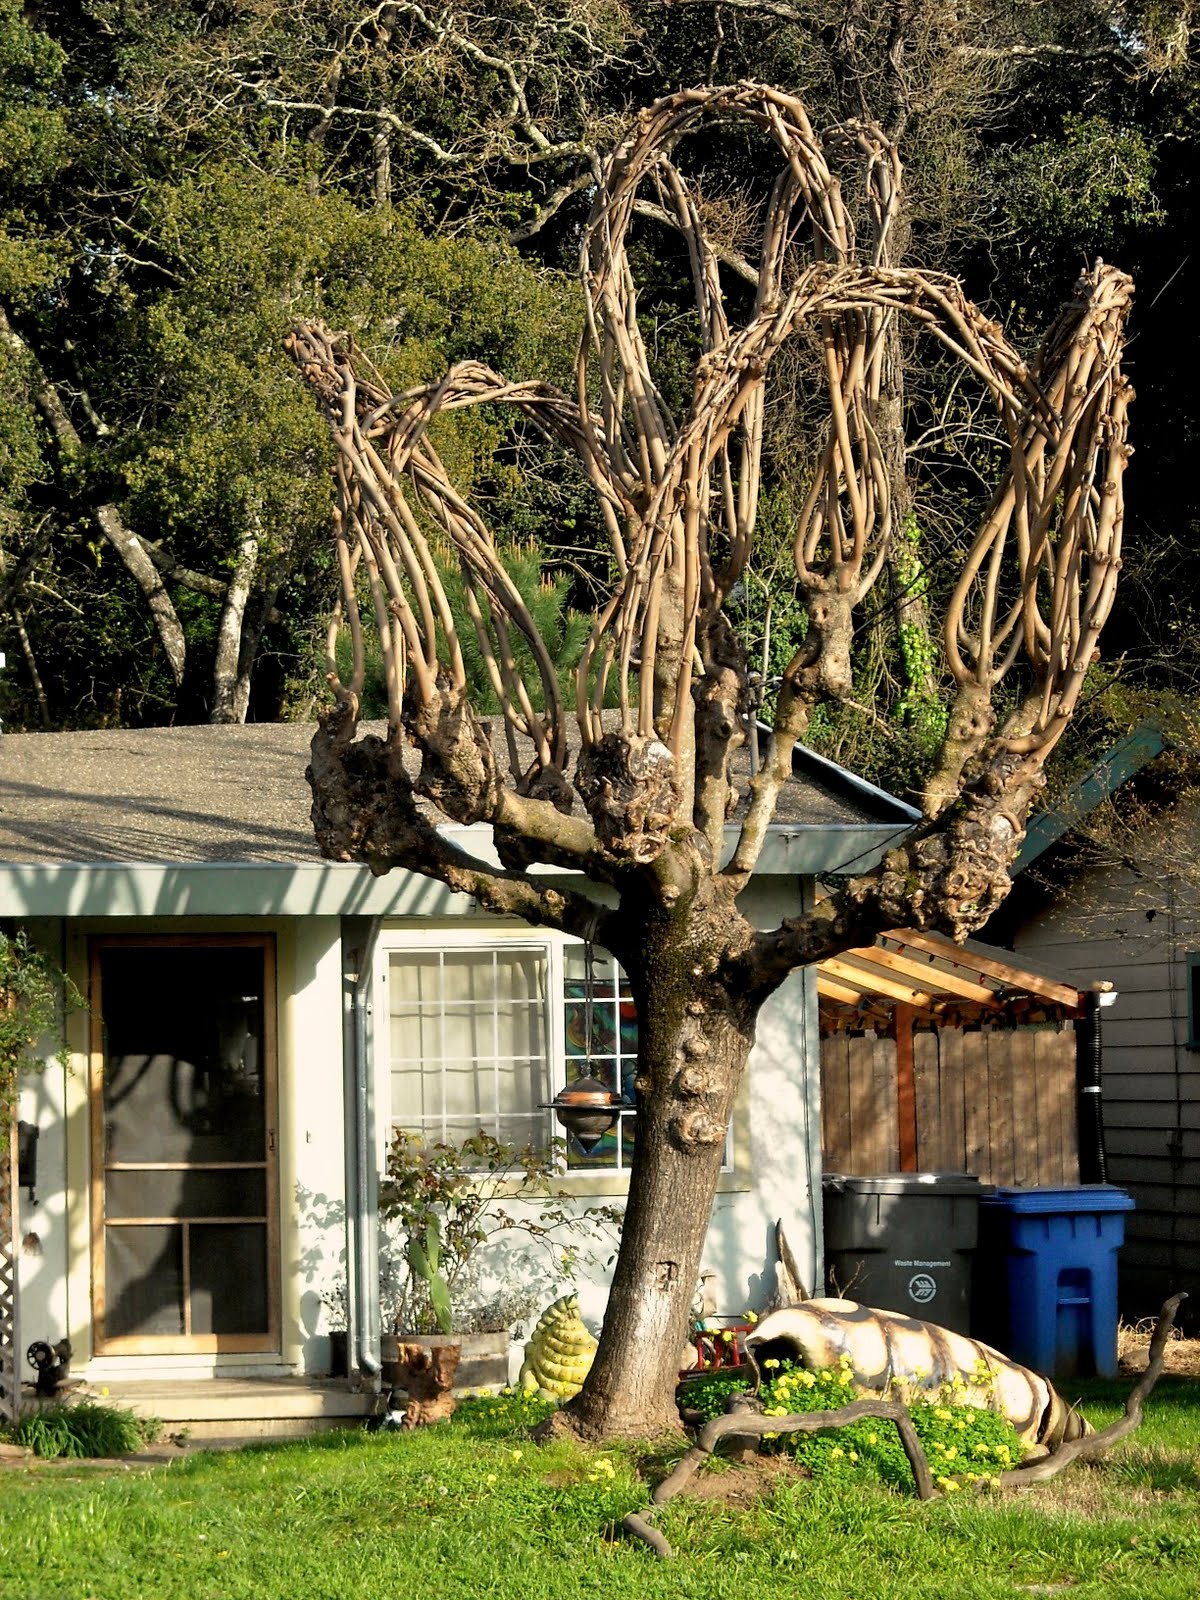
The Egg-Beater Tree


An eccentric tree no doubt. I got carried away while pruning. (Actually, this is being cultivated by a person I haven’t met yet.) I like to call it the egg-beater tree. The winter deciduous shot of this London Plane tree shows all the limbs and the layout. The leafy version show why apical dominance has such a strong influence on tree growth. With more leaves at the top of each main “beater” the influence of apical dominance is revealed. The hormone forces new growth at the highest point of the bough/beater.


“BUY FROM THE SOURCE TO HELP KEEP WRITERS WRITING”


Let me know what you think. Visit my web site to learn about my new book on drip irrigation and other gardening books. Thanks, Robert

Monday, May 10, 2010

Gopher It - Baskets & All


Spring time and baskets are rollin’…into the ground. Gophers in the west (certainly around my home) have sprung from the womb and are seeking new territory. This means there’s a mass migration as each gopher tries to stake out it’s new home. Thus many gophers means plenty of damage to roots. In my neck of the woods, gardeners are “planting” wire baskets with the transplants inside. It seems to work, but not all the time. I lost an apple tree to a gopher who simply climbed over the wire and into a protected paradise of yummy rootlets. I spent hours in the USDA Ag. Library (the largest collection of ag. and hort. books in the country) looking for “the answer”. I finally found a report where the researchers wanted to capture live gophers. They built a “V”-shaped live trap with 10-inch-tall wire sides. The gophers simply crawled over the wire. Alas, my futile attempt at a four-inch exposure above the mulch didn’t save the apple tree. However, I learned a lot about roots after I dug up the roots of the apple tree. Nearly 90% were inside the two-foot wide by 24-inch deep wire basket. Most roots where eaten off just as they tried to leave the basket—as seen in the photo on the left. Here is one of the lone roots that escaped the greedy gopher mouths.

“BUY FROM THE SOURCE TO HELP KEEP WRITERS WRITING”


Let me know what you think. Visit my web site to learn about my new book on drip irrigation and other gardening books. Thanks, Robert

Wednesday, May 5, 2010

Pretty? NO!


The Scotch broom pictured here is beautiful while blooming. But this exotic invasive is like standing gasoline during the summer & fall. See the list below of other invasive plants.

When Masanobu Fukuoka, author & guru of The One-Straw Revolution, visited the Northwest he remarked that we should spreed this plant around because it was such a good nitrogen fixer. Shows what carnage can be considered when you're out of your ecosystem.

California alone is home to 4,200 native plant species, and is recognized internationally as a "biodiversity hotspot." Approximately 1,800 non-native plants also grow in the wild in California. Here’s a short list of just some of the invasive plants in California alone. Data is from the
USDA. NAL. National Invasive Species Information Center.

http://www.invasivespeciesinfo.gov/unitedstates/ca.shtml

It’s strange that this list does not include three major invasive plants: ice plant [Mesembryanthemum ssp.], pampas grass, [Cortaderia selloana], and Periwinkle [Vinca ssp.].

NOTE: "3:1 rule: For every year you delay controlling an invasive plant infestation, it will take three years to regain control."

Common Name ( Botanical Name)
Air Potato (Dioscorea bulbifera)
Autumn Olive (Elaeagnus umbellata)

Beach Vitex (Vitex rotundifolia)

Brazilian Peppertree (Schinus terebinthifolius)
Canada Thistle (Cirsium arvense)

Chinese Tallow (Triadica sebifera)
Cogongrass (Imperata cylindrica)

Common Teasel (Dipsacus fullonum)

Dalmatian Toadflax (Linaria dalmatica)

Diffuse Knapweed (Centaurea diffusa)

Downy Brome (Bromus tectorum)

Fig Buttercup (Ranunculus ficaria)
Garlic Mustard (Alliaria petiolata)

Giant Hogweed (Heracleum mantegazzianum)

Hairy Whitetop (Lepidium appelianum)

Houndstongue (Cynoglossum officinale)

Japanese Stilt Grass (Microstegium vimineum)
Japanese World Climbing Fern (Lygodium japonicum) 

Japanese Honeysuckle (Lonicera japonica)

Japanese Knotweed (Fallopia japonica)

Japanese Spiraea (Spiraea japonica)
Johnsongrass (Sorghum halepense)

Kudzu (Pueraria montana var. lobata)

Leafy Spurge (Euphorbia esula)

Medusahead (Taeniatherum caput-medusae)

Mile-A-Minute Weed (Persicaria perfoliata)

Multiflora Rose (Rosa multiflora)

Musk Thistle (Carduus nutans)

Old World Climbing Fern (Lygodium microphyllum) 

Oriental Bittersweet (Celastrus orbiculatus)

Princess Tree (Paulownia tomentosa)
Purple Star Thistle (Centaurea calcitrapa)

Quackgrass (Elymus repens)

Russian Knapweed (Rhaponticum repens)

Russian Olive (Elaeagnus angustifolia)

Saltcedar (Tamarix spp.)

St. Johnswort (Hypericum perforatum)

Scotch Broom (Cytisus scoparius)

Scotch Thistle (Onopordum acanthium)

Spotted Knapweed (Centaurea stoebe)

Tree-of-Heaven (Ailanthus altissima)

Tropical Soda Apple (Solanum viarum)

Whitetop (Lepidium draba)

Witchweed (Striga asiatica) 

Yellow Star Thistle (Centaurea solstitialis)

Yellow Toadflax (Linaria vulgaris)

As Good as Beans


The Ceanothus shrubs & trees (Ceanothus spp.) are just past their peak. But they have offered a glorious view. In the forest it is especially important to have the early colonizing trees because, while not being in the legume family, they fix nitrogen from the air into soluble nitrogen nodules on their roots—just like beans & peas.

Other non-leguminous nitrogen fixers include: Alder trees & shrubs (Alnus spp.), bayberry & sweet gale (Myrica spp.), & sweetfern (Comptonia peregrinal).


“BUY FROM THE SOURCE TO HELP KEEP WRITERS WRITING”


Let me know what you think. Visit my web site to learn about my new book on drip irrigation and other gardening books. Thanks, Robert

Saturday, May 1, 2010

Pretty Mustard - Not


Every late winter through early spring Napa Valley, CA celebrates the glorious mustard growing between the dormant rows of grape vines. Many intoxicating and spectacular photographs have been taken of this magical season.

But wait. It’s really a horticultural nightmare. Color photos reveal a damaged soil and ecosystem.

Here’s what they do:

“Indulge in fantasy at Mustard Magic, Napa Valley’s most theatrical food, wine, and art event of the year. The Season’s opulent grand opening event graces every contour of the magnificent, historic three story stone building, home to the Culinary Institute of America at Greystone.
As you stroll the art-filled candle lit spaces, sumptuous offerings of food and wine, living art, and music will entice you at every turn. Bid on art, take a turn on the dance floor, savor gourmet fare in the world famous teaching kitchen and raise your paddle high at the event’s live auction to win exotic trips, Napa Valley sojourns, wine and more!
Tickets are $125”

Here’s what I think about the wild mustard, black mustard (Brassica nigra), growing in the vineyards, as seen in the photograph on the right.

Black mustard is one of the few plants that thrives in heavy, clay soil. Or, in soil tilled at the wrong time; when too wet, which leads to the collapse of the pore structure and loss of air. The fields of mustard are actually an indicator of poor drainage, improper tillage, and a special influence known as allelopathy.

Allelopathy is where root exudates harm the plants around them. In most cases it’s a root’s exudates that is a chemical that stunts or kills the roots of other plants. Wild mustard is such a plant. It tends to favor itself over other plants, thus the swaths of continuous mustard.

To substantiate my theory I point to three events: the mustard usually ends at the edges of the vineyard (as seen above on the left), some vineyards haven’t a trace of mustard-perhaps because they were able to till when the soil was too wet or the soil has good drainage-and mustard can be found outside the vineyards mostly along the side of the road where the soil has been compacted and in fields where too many cows have trampled the soil. The photograph on the left shows the adjacent field next to the vineyard full of mustard.

(As a side point, there is a narrow orange patch of wild calendulas along side of the growth in both pictures. It’s wild because it has “back bred” to a plant with a much smaller flower. How the calendulas got there is a mystery. They are not in many vineyards. Some are in rows adjacent to flower gardens surrounding the winery’s sales room or storage barn. They seem to be unable to take much shade and thrive at the very edges of a field or the interface of the bare soil next to the vines (read Round-Up™) and the edges of the row of a cover crop. Still a mystery.)

Click on both photographs to enlarge them to see the mustard & calendulas better.


“BUY FROM THE SOURCE TO HELP KEEP WRITERS WRITING”


Let me know what you think. Visit my web site to learn about my new book on drip irrigation and other gardening books. Thanks, Robert

Monday, April 26, 2010

Root Bondage


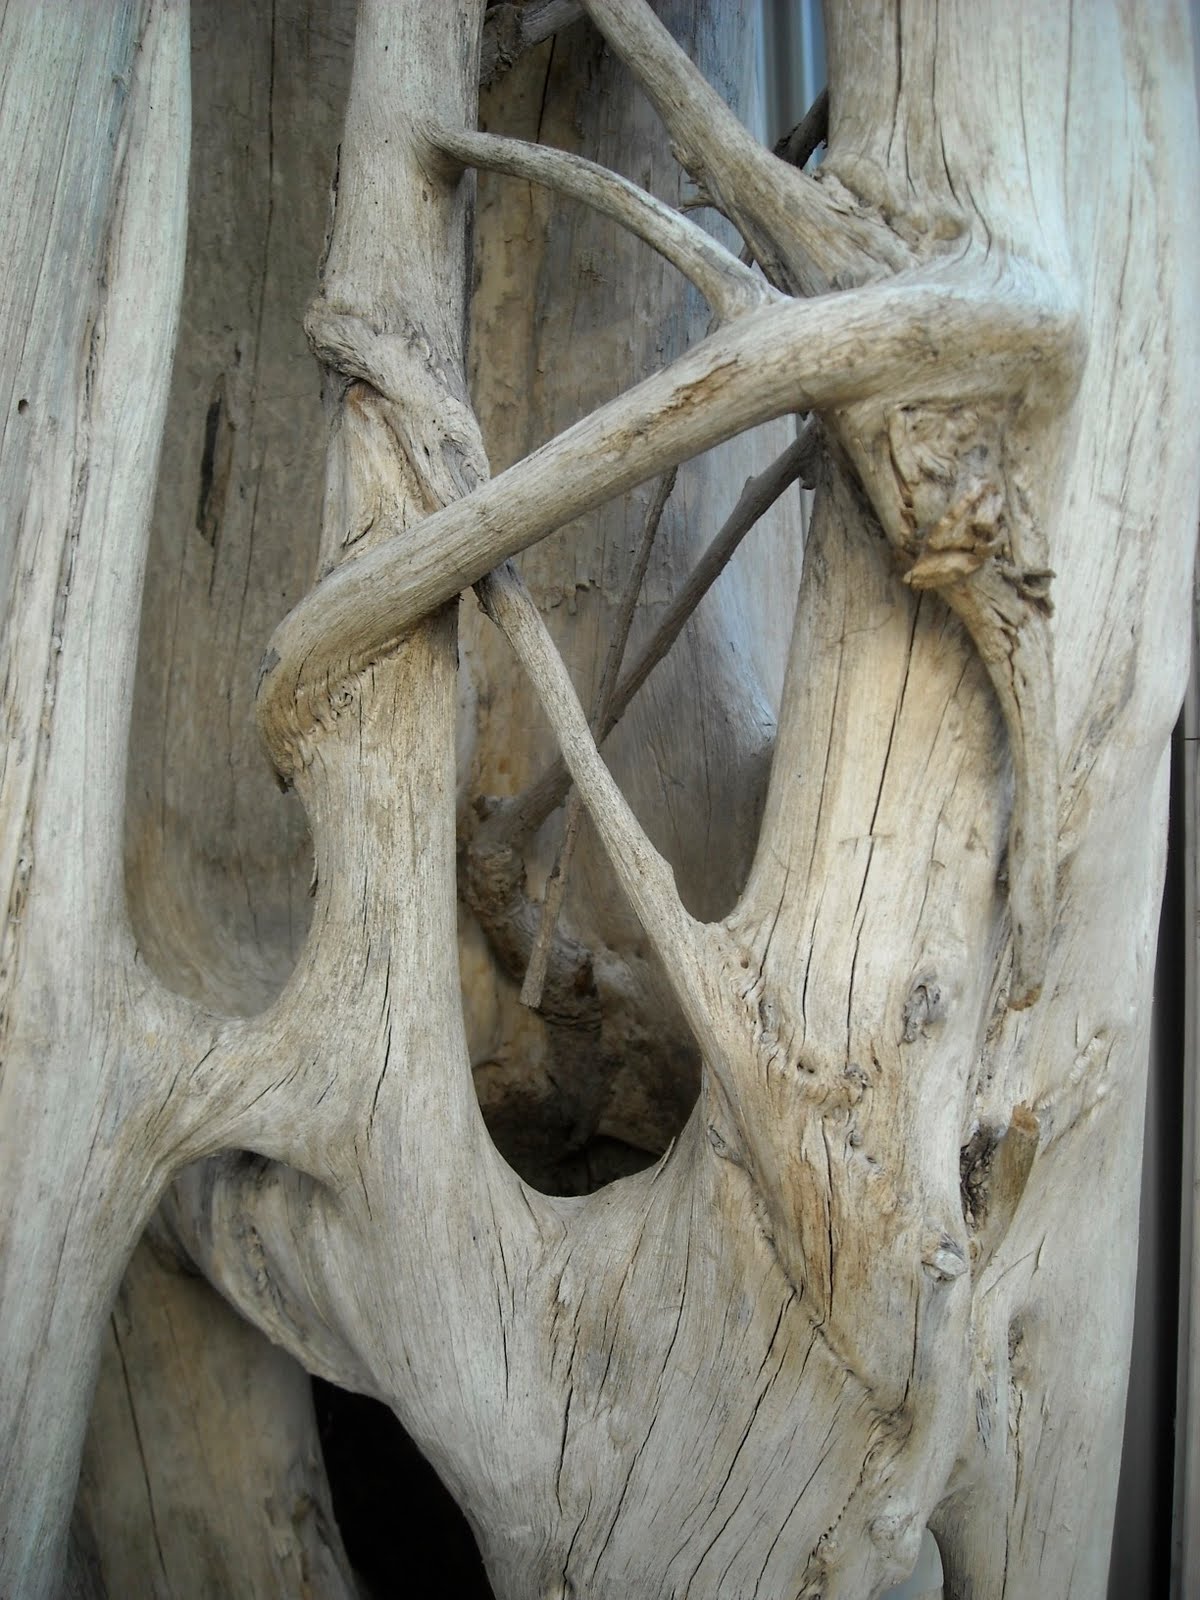
This is actually a close-up photograph of a special strangling vine. However, you can find similar unions between two or more roots in a walk along the Pacific CA coast near my house. The naturally grafted roots do not pass any significant nutrients between the trees. But the union helps the trees to be even more sturdy to high winds.

Here’s the description from the store that sells these vines of what they are all about. (Have plenty of money because the cheapest ones start at over $1000.00!)

http://www.artefactdesignsalvage.com/products-page?id=19&car_num=1&start=1

A completely natural strangler vine form shaped by years of growth around a host tree. Its current appearance is achieved by carefully cutting the tree out of the center so only the vine remains. Next the vine’s own bark is removed, and then every inch is painstakingly sanded by hand. This is one of our larger, more striking forms. Great as a natural work of art indoors, or a beautiful garden sculpture outdoors. Will fade to a driftwood grey if exposed to the elements.

“BUY FROM THE SOURCE TO HELP KEEP WRITERS WRITING”


Let me know what you think. Visit my web site to learn about my new book on drip irrigation and other gardening books. Thanks, Robert

Sunday, April 25, 2010

Poppies


The CA poppies are in full bloom. I found this rare petal formation.(Ordinary on left. "rare" on the right.)

Wednesday, April 21, 2010

Drip Tubing for Trees


Tree roots grow one and one-half to two and even three times the width of the foliage above. More amazingly, this ratio is maintained throughout the life of the tree, regardless of the rootstock, species and soil.

These two trees don't understand this basic rule of thumb. The one with two circles has the right idea that trees should be watered in circles. But at least the inner circle with the beige/brown tubing is too close to the trunk. This is at least a waste of tubing. With drought tolerant trees and many other water sensitive roots can receive enough water to cause root rot. Put the emitters further out, near the dripline of the canopy. (Based on the book Drip Irrigation- For Every Landscape and All Climates.)


“BUY FROM THE SOURCE TO HELP KEEP WRITERS WRITING”


Let me know what you think. Visit my web site to learn about my new book on drip irrigation and other gardening books. Thanks, Robert

Tuesday, April 20, 2010

Pollarding, Oy Vey


A futile attempt at pruning an ornamental ‘Bradford Pear’ tree to keep it from blocking the names of the business. (The photograph on the right.) The trees were bought on a whim by somebody that wasn’t thinking about their future size. The pitiful attempt to turn them into some kind of pollarded tree sure doesn’t seem to working. This tree has been pruned (hacked) this way for over 5 years. Don’t make this mistake! Sycamore/London Plane trees work much better and are the common tree for pollarding trees in Paris and other countries, as seen in the photograph on the left.


“BUY FROM THE SOURCE TO HELP KEEP WRITERS WRITING”


Let me know what you think. Visit my web site to learn about my new book on drip irrigation and other gardening books. Thanks, Robert

Thursday, April 15, 2010

Organic Phosphorus? Maybe Not


Purplish strips at the edges of corn leaves usually indicates a deficiency in phosphorus. Some organic gardeners use colloidal phosphate as the solution to this deficiency, but consider this: colloidal phosphate is often strip-mined in Florida, washed with water (and Florida has a big problem with supplies of fresh water), loaded on train cars, and shipped to places as far away as California and Washington, where it’s sacked up and shipped to your local garden-supply store.

[As a side note: Florida mines 75 percent of the phosphorous used by American farmers and about 25 percent of the entire world production. Phosphate ore must be chemically processed with sulfuric acid. When sulfuric acid reacts with the phosphate it produces a slightly radioactive byproduct known as phosphogypsum. According to the Florida Department of Environmental Protection, there are a billion tons of phosphogypsum stacked across the state and 30 million tons are generated each year.]

And the total amount of phosphorus (P2O5) in the sack is only 16 percent of all the bagged-up bulk, of which a mere two percent is available the first gardening season since the phosphorus is locked up in a mineralized form that requires the activity of soil microbes, soil bacteria, and exudates. (Exudates aid in the nutrient-release process by releasing; sugars, organic acids, and other compounds to dissolve minerals into a soluble state and stimulate the soil’s microbial action.) Unnecessary water use, exploitation of limited resources and wasted energy—all wrapped in a single bag. Add to this the fact that there is a limited supply of easily mined colloidal phosphorus. It’s much like oil: will we have enough in the future? Will we be able to find enough new supplies if the current mines are exhausted? Some say the U.S. supply will be gone by 2035. The world supply make be depleted in 50-100 years.

Choosing to buy commercial colloidal phosphate means making a very important environmental decision. This is especially clear when one compares the environmental cost of imported amendments to the energy-efficiency of “growing” phosphorus at home by planting legumes and tilling the young foliage into the soil. Thus the gardener has two choices: (1) import nutrients, organic or not, to force an intensive yield, or (2) use wider spacing when planting and/or rotate heavy-feeder crops with a season of legumes to cut down on the competition for available nutrients. Whichever you choose, don’t grow corn in the same spot every year, as it will exhaust much of the nitrogen. Instead, alternate corn crops with green manures—that also increase available phosphorus.

(The illustration above is an excavation done by John Weaver in the '30s. It is a view looking down on the expansive root system of corn. Each square is one-foot square. As seen in my book Roots Demystified, Change Your Gardening Habits to Help Roots Thrive.)

“BUY FROM THE SOURCE TO HELP KEEP WRITERS WRITING”


Let me know what you think. Visit my web site to learn about my new book on drip irrigation and other gardening books. Thanks, Robert

Tuesday, March 30, 2010

Get to Know Your Wet Spots


To test your soil and to understand how emitters work, buy a single emitter, use an emitter punch (which cuts a tiny circular hole) to pierce a hole near the bottom of an empty plastic one-gallon milk jug, and insert the emitter's barb. Fill the jug with water and place it on a dry spot in the garden. After the milk jug is empty (which may take 24 hours or more because it's not under pressure), dig a small trench next to the emitter to see the shape of the wet spot in your soil. This is the most graphic way to understand how the water from each emitter you install will move in your soil. (The shape of the wet spot will change, usually both wider and deeper, when the emitter is used under pressure.) The shape of the moist area is affected differently by each type of garden soil and ranges from long and carrot-like to squat and beet-shaped. Emitters with a higher rating, such as 2 or 4 gph, will cause the wet spot to be wider than 1/2 or 1 gph emitters.

A moist-but-not-too-wet spot that is the key to drip irrigation's superiority over all other forms of irrigation. With proper timing, a drip irrigation system provides moisture to the soil without overly saturating the pore spaces in the soil. The labyrinth of minute pore spaces helps the soil breathe. When a more aerobic condition in the soil is maintained by drip irrigation, the roots don't drown, the soil's beneficial bacteria can continue to release valuable nutrients, and harmful anaerobic fungi don't easily proliferate—thus, better growth and greater yields

The lower chart (From Drip Irrigation for Every Landscape and All Climates) and shows how the water can move in a theoretical soil. The darker the wet spot, the more it is anaerobic.


“BUY FROM THE SOURCE TO HELP KEEP WRITERS WRITING”


Let me know what you think.Visit my web site to learn about my new book on drip irrigation and other gardening books. Thanks, Robert

Yikes, Don't do this at home!


There's a reason it's called "spaghetti" tubing. Here we see some breeding to make more of a mess in the garden. Avoid the mess with in-line emitter tubing. I favor it over all "spaghetti" for most landscape uses in my book Drip Irrigation, For Every Landscape & All Climates.

“BUY FROM THE SOURCE TO HELP KEEP WRITERS WRITING”


Let me know what you think.Visit my web site to learn about my new book on drip irrigation and other gardening books. Thanks, Robert

Sunday, March 28, 2010

Calculating your daily water needs


For referral to the previous post, here's a repeat of an earlier blog. Pick an ET rate (as given from your local Coop. Extension), follow the column down to the square footage of your planting area, and you'll be given the amount of water for each day. Click on the image and load into a page where you can enlarge the image. If this is too complicated, just buy my Drip Irrigation book from my website, www.robertkourik.com :)

“BUY FROM THE SOURCE TO HELP KEEP WRITERS WRITING”


Let me know what you think.Visit my web site to learn about my new book on drip irrigation and other gardening books.NOTE: The comments section at the bottom of the post has disappeared. Click on the "___ Comments" button or the title under the "Blog Archives". Thanks, Robert

Springtime: Starting Up Your Drip Irrigation System


Time to flush out the drip systems and plan irrigation timing. As the soil begins to dry in the arid summer-rainless gardens, it's time to turn on the system to keep the soil as moist as it was in Spring. Like good comedy, timing is everything.

The photo shows lines of in-line drip tubing (Shown here before planting.) designed for even irrigation for the entire roots system, as described in the April 19th, 2008 blog entry.

I like to think of frequent irrigation as "topping off the tank." Starting with an ideal soil moisture, (not too anaerobically wet and not too parched) the goal is to replace, as often as each day, exactly the amount of moisture lost due to evaporation from the soil and transpiration from the plant's leaves (this amount is called the ET rate, for EvapoTranspiration), plus an amount that represents enough extra water for higher yields or more gorgeous ornamental foliage. I quote from the preeminent book on trees, Arboriculture, by Richard W. Harris: "In contrast to other systems, drip irrigation must be frequent; waterings should occur daily or every two days during the main growing season...the amount of water applied should equal water lost through evapotranspiration."

Three studies summed up by D. A. Bucks and F. S. Nakayama and A. W. Warrick in “Principles, Practices, and Potentialities of Trickle (Drip) Irrigation,” “Imply that the best policy is to apply water frequently as possible... assuming that no problems of soil aeration, plant disease or restricted plant rooting will occur.”

This is not to say that experience with other crops or plants wouldn’t produce different results. In a study of cucumbers and melons (“Effects of Different Irrigation Scheduling and Systems on Yield Response on Melon and Cucumber,” P. Mannini, Boglona, Italy, Acta Horticulturae #228 [1988], pg. 155-162) it was found that three-day versus six-day intervals of irrigation “had no effect on yield or observed parameters.” Obviously, the details need to be adjusted to the specific plant and any observed response. In another study, as presented on pg. 282 of “Principles, Practices, and Potentialities of Trickle (Drip) Irrigation,” “Less frequent [12-, seven-, six- or three-day intervals versus daily] irrigation tended to increase yields on cabbage, cantaloupe and grapes. Shallow-rooted dry onions [Editor's note: onions' roots can grow down to three feet] had higher yields with daily than with weekly trickle irrigations.” Nature is diverse, and so should be our response.

An ET-based irrigation schedule means applying the exact same amount of water as used on, for example, a monthly basis, but in a very different pattern of application. If the daily ET requirement is .125 gallons per square foot - as described in my book with the ET chart on page 52 - Drip Irrigation, For Every Landscape & All Climates - then a weekly watering schedule would apply seven times this amount (.875 gallons) and a monthly watering would apply 30 times this amount (3.75 gallons)—but all equal to the same daily unit of water.

Frequent Irrigation of Xeric Plants
There are plenty of xeric California native plants which can be killed by improper irrigation, but the range of watering options for xeric plants is greater than many assume. Consider the new cultivar garden installed in 1992 at the highly respected Rancho Santa Ana Botanic Garden in Pasadena, CA, which contains an enormous number of California native plants. To maintain these specimens, the Garden purchased thousands of dollars worth of the same in-line emitter tubing I recommend in my drip irrigation book. This tubing has special pressure-compensating emitters, with a complex, or "tortuous" path which prevents clogging, preinstalled inside the 1/2-inch drip hose. In the Santa Ana garden, the tubing was laid out on a clayey soil in a conservative pattern which allocates only about two to three emitters per plant.

While they didn't irrigate daily, the system, during the first year, dispensed water twice weekly for two minutes. This is, of course, far more frequent than the common drought-resistant gardening concept of no summer watering or only occasional deep watering. According to staff horticulturist Bart O'Brien, "The growth has been tremendous." This success is due to the proper mix and placement of emitters, appropriate irrigation intervals and length of irrigation. In the second year, the irrigation was stepped back to once every five days with a staggered irrigation cycle (on for a minute, off for 1/2-hour, on for a minute, off for 1/2-hour and on for one minute). This fancy scheduling was necessary to deal with their clay soil, which quickly puddles under most schedules or types of irrigation.


“BUY FROM THE SOURCE TO HELP KEEP WRITERS WRITING”


Let me know what you think.Visit my web site to learn about my new book on drip irrigation and other gardening books.NOTE: The comments section at the bottom of the post has disappeared. Click on the "___ Comments" button or the title under the "Blog Archives". Thanks, Robert